
Enabling payments via payment processors in smart contracts
Part 2 of 2
Connecting smart contracts to Stripe
using Silent Data [Oracle]
using Silent Data [Oracle]

Noam Elstein
January 15, 2024
This tutorial forms the second half of a 2-part blog series. In part 1 we explain the benefits of accepting card payments in smart contracts, available to read here.
In this section, we will show you how to connect Silent Data [Oracle] to Stripe to enable payments via off-chain payment processors securely. Follow this step-by-step tutorial to kick off your Silent Data job configuration!If you have not created a Silent Data [Oracle] account, Sign up now to follow along yourself (It's free to test, no credit card required).
A Step-by-Step Guide for Connecting Stripe to Smart Contracts
The video below can be followed as a companion to this guide.
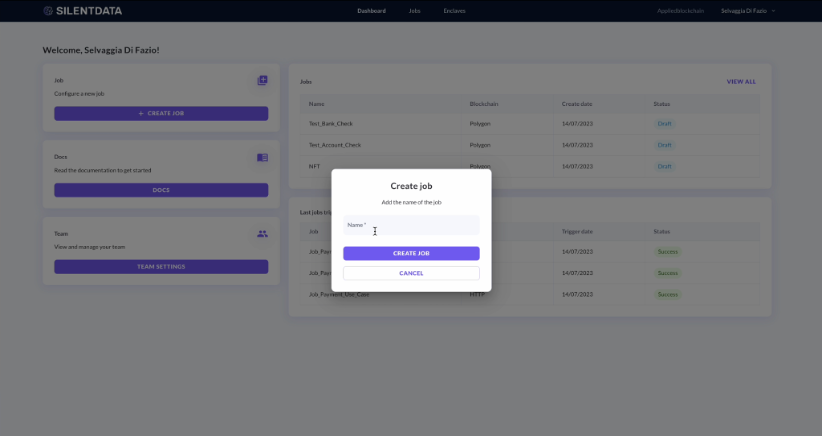
Step 1: Configure the job and trigger
Start by clicking Create Job and give your job a name e.g. "Stripe Integration".
Now we will Configure the trigger.
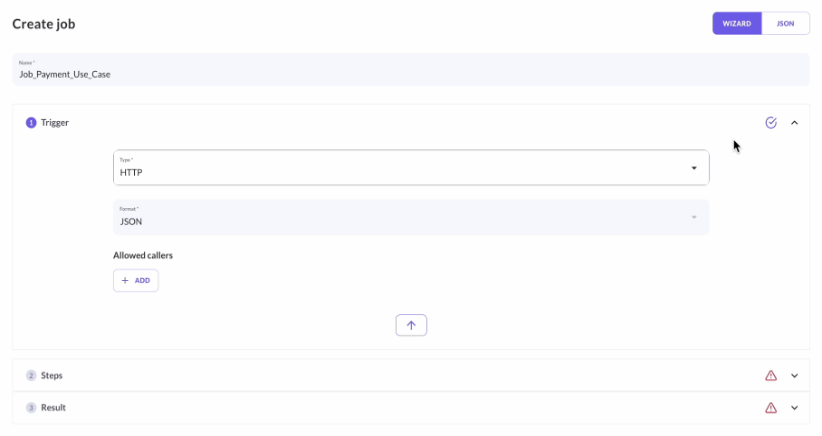
The Trigger determines how to activate the job. In this case, the job Type is HTTPS as it is a webhook triggered use case.
Additionally, you may grant calling permission to enhance your security using the Allowed callers feature. In particular, when using an HTTPS trigger, this will require the caller to have the correct IP addresses to trigger Silent Data [Oracle], which you determine - Stripe makes their public IPs available for webhook notifications.
For use cases that use the smart contract trigger, this will require the caller to have one of the correct smart contract addresses. These steps allow us to prevent fraudulent job triggers which could drain your funded job configurations.
Step 2: Configure the steps
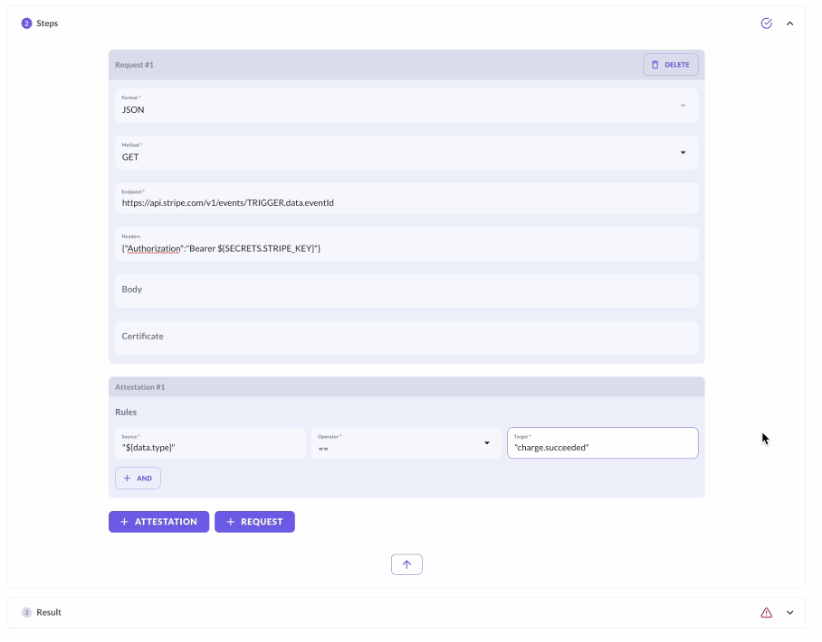
Request #1
The request is the step that allows the user to define the private API in order to call for the data required by the job. This is followed by the description of the data needed to complete the configuration.
Method determines what kind of function you require the job to perform. Regarding the Stripe use case, we are getting data, so we use a GET method.
The Endpoint is an API URL, here a Stripe event API, is the specific location of accepting requests and returning responses. The endpoint URL required depends on the type of job you are configuring.
Given the method ‘GET’, we are retrieving event data from Stripe, so require the appropriate endpoint. The API endpoint for retrieving a Stripe event is ‘/v1/events/:id’. Check Stripe to find the correct endpoint for other APIs.
Activity on Stripe creates Event objects, and the variable ‘TRIGGER’ extracts the event id from the list of payment events received.
The Header provides authorisation to the bearer of the Stripe API key i.e. whoever holds the secret API. The syntax for the authorisation is in a JSON call format, and as seen in the video, must match the name of your secret. Depending on the API you call, it may be necessary to send data in the body to the API. The Certificate is an additional security feature that provides encryption and authorisation to access an API. Neither are applicable in the Stripe example.
Attestation #1
The attestation outlines the required check on the data being called.
Next, it is time to create the Rules for your call. The Source determines the variable or value of the data you want to check. Meanwhile, the Target defines what to compare your value to for a successful result - here for a confirmation of the payment charge.
Step 2(b): Configure Secrets
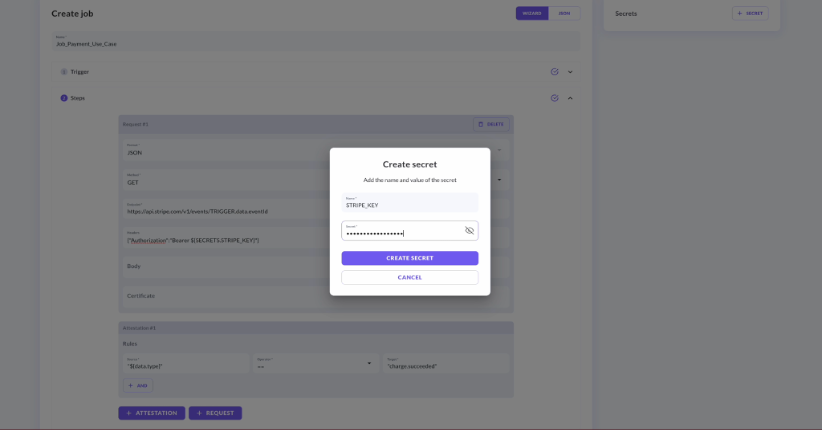
(The Silent Data [Oracle] operator never actually sees your API key! Want to know how this is possible? Check out our intro to Silent Data [Oracle].)
Stripe API Key
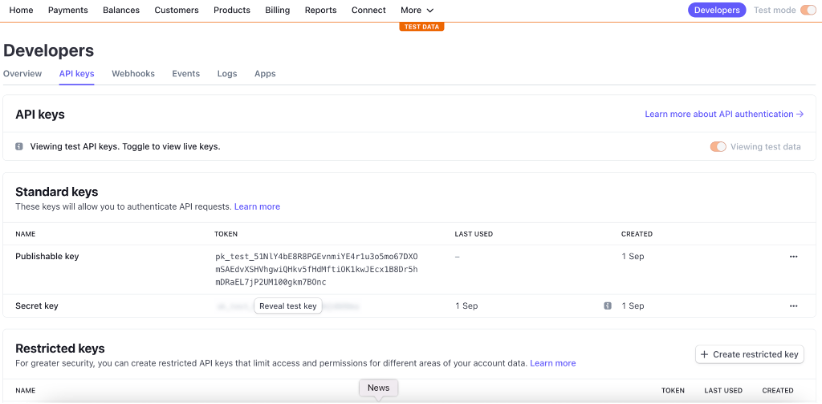
- Open Stripe Dashboard
- Click ‘Developers’ in the top right corner of the Dashboard
- Press ‘API Keys’ under the new Dashboard, on the left hand side
- Reveal test key to get your Secret key, copy and save it in a safe place
Step 3: Configure the result
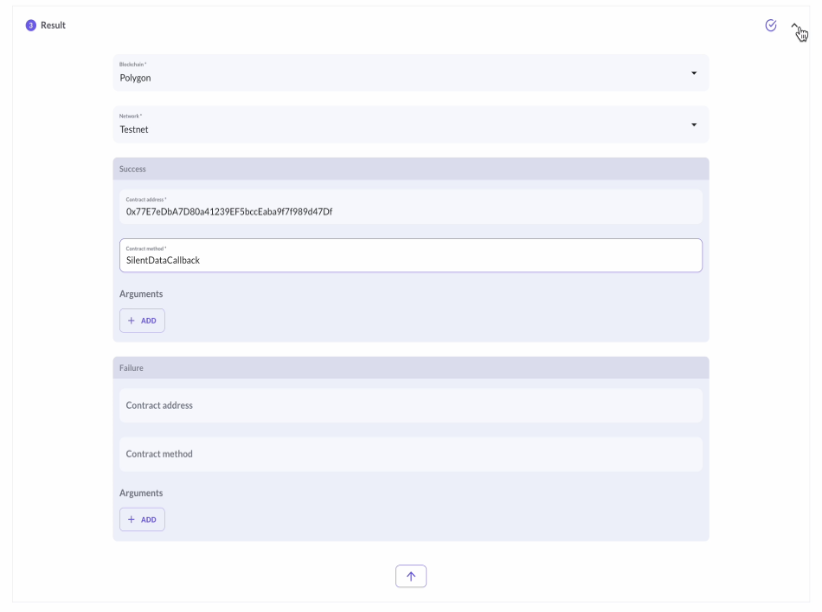
Success
The Contract address is taken from your callback contract. The Callback contract allows us to pass the job's results to your dApp. A callback contract is a smart contract that contains a method Oracle can use to publish required information on-chain.
Step 4: Fund and publish your job
Oracle jobs are funded using USDC. In order to add funds to the job and operate, it is necessary to assign a funding manager and select a Token ID. The funding manager has the right to remove any unused funds from the job, this is important in the case of over funding, or changing APIs. Once the job is configured, anyone can top up the wallet.
In the video, as we are using the Sepolia testnet network, we must connect our Metamask wallet to Sepolia. Any faucet may be used to supply Seoplia Ethereum (ETHSepolia) - the tokens used for Sepolia testnet.
Publish the Job
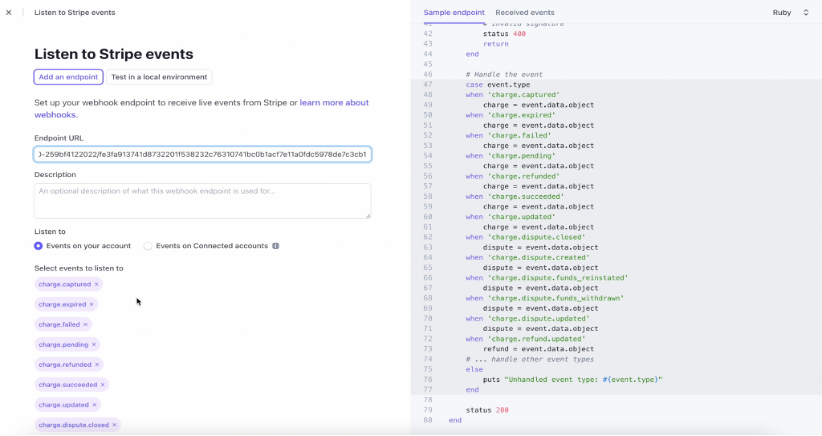
On this page, select the events you want Oracle to listen to i.e. trigger on. In this example, the Oracle URL is set to listen to the payment events in Stripe and thus be triggered every time a payment is completed on the designated Stripe account.
Having pasted the endpoint URL and selected events, click Add endpoint, to trigger your job. The remainder of the video is simply an example of making the Stripe payment.
Callback Contract
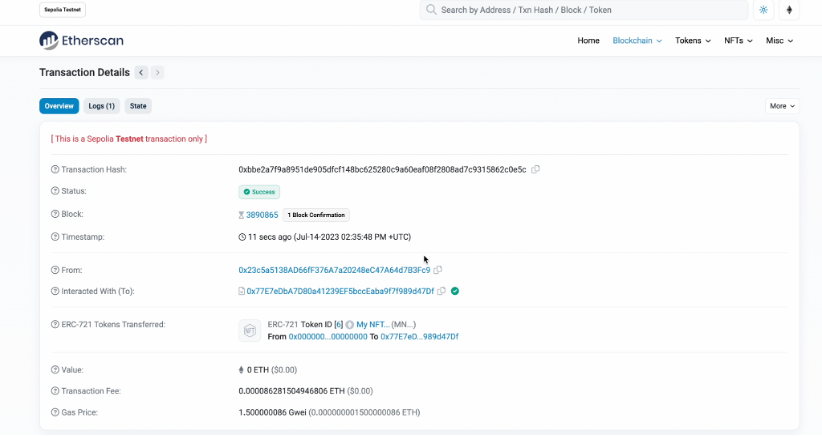
Your callback contract consumes the result of the Oracle job. Etherscan, the interface seen in the video, lets you monitor the status of transactions on a smart contract address.
Visualise the results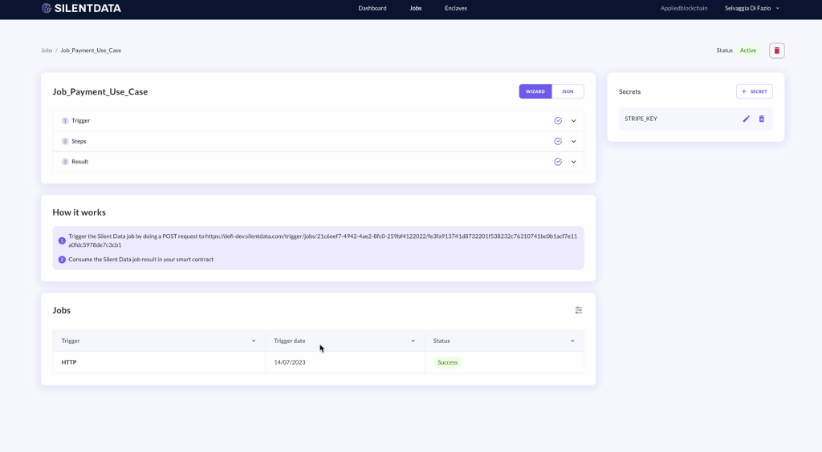
You can also visualise the result of the job inside Oracle, track which ones have been triggered and monitor their status.
Conclusion
Oracle allows developers to easily and securely connect web2 payment providers like Stripe to their smart contracts. Stripe is just one use case for Silent Data [Oracle], and a multitude of other enterprise and DeFi use cases exist, consult the Silent Data [Oracle] documentation for more detail.

© Copyright 2024 Applied Blockchain Ltd.
All rights reserved Applied Blockchain Ltd is a company registered in England and Wales. Company No. 09686276


© Copyright 2024 Applied Blockchain Ltd.
All rights reserved Applied Blockchain Ltd is a company registered in England and Wales. Company No. 09686276